INSTALLATION TIPS
CHE PRECISION LS ROCKER ARM TRUNNION KIT INSTRUCTIONS
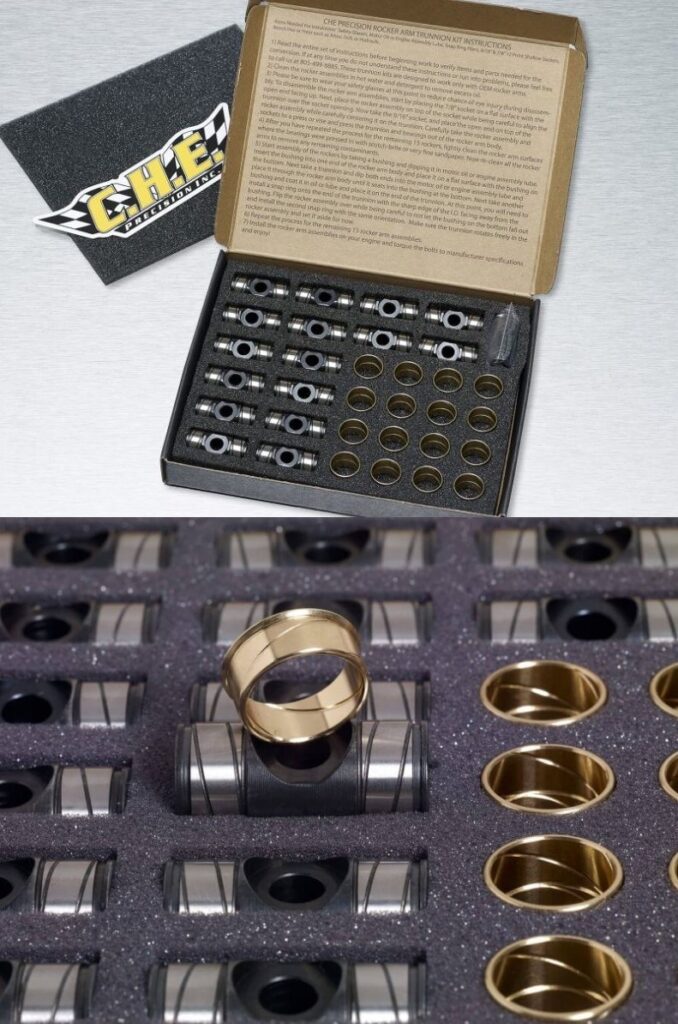
Items Needed For Installation:
Safety Glasses, Motor Oil or Engine Assembly Lube, Snap Ring Pliers, 9/16” & 7/8” 12 Point Shallow Sockets,Bench Vise or Press such as Arbor, Drill, or Hydraulic.
- These rocker arm trunnion conversions are designed for a maximum .650” lift and an engine limit of 8500 RPM.
- Read the entire set of instructions before beginning work to verify items and parts needed for the conversion. If at any time you do not understand these instructions or run into problems, please feel free to call us.
- Clean the rocker assemblies in hot water and detergent, such as Simple Green or dish soap to remove excess oil.
- Please be sure to wear your safety glasses at this point to reduce chance of eye injury during disassembly. To disassemble the rocker arm assemblies, start by placing the 7/8” socket on a flat surface with the open end facing up. Next, place the rocker assembly on top of the socket while being careful to align the trunnion over the socket opening. Now take the 9/16” socket, and place the open end on top of the rocker assembly while carefully centering it on the trunnion. Carefully take the rocker assembly and sockets to a press or vise and press the trunnion and bearings out of the rocker arm body.
- After you have repeated the process for the remaining 15 rockers, lightly clean the rocker arm surfaces where the bearings were pressed in with scotch-brite or very fine sandpaper. Now re-clean all the rocker arms to remove any remaining contaminants.
- Start assembly of the rockers by taking a bushing and dipping it in motor oil or engine assembly lube. Insert the bushing into one end of the rocker arm body and place it on a flat surface with the bushing on the bottom. Next take a trunnion and dip both ends into the motor oil or engine assembly lube and place it through the rocker arm body until it seats into the bushing at the bottom. Next take another bushing and coat it in oil or lube and place it on the end of the trunnion. At this point, you will need to install a snap ring onto the end of the trunnion with the sharp edge of the I.D. facing away from the bushing. Flip the rocker assembly over while being careful to not let the bushing on the bottom fall out and install the second snap ring with the same orientation. Make sure the trunnion rotates freely in the rocker assembly and set it aside for now.
- Repeat the process for the remaining 15 rocker arm assemblies.
- Install the rocker arm assemblies on your engine and torque bolts to manufacturer specifications and enjoy!